Facebook Messenger Chatbot entwickeln
In this article we want to give you an overview of how to develop a chatbot for Facebook Messenger using the Send/Receive API, Wit.ai, node.js and Google.
In this article we want to give you an overview of how to develop a chatbot for Facebook Messenger using the Send/Receive API, Wit.ai, node.js and Google App Engine. As a mobile app solutions agency based in Vienna and Berlin we think that bots will accompany or extend apps and visual user interfaces in the future and become an important part of how we as humans will interact with organizations and systems. A chatbot is basically an additional interface to an application that might or might not be suitable.
The goal of this tutorial is to that you will have a (chat-)bot with artificial intelligence (AI), that will answer people that write to you Facebook page on Messenger. Sounds easy, right? ;) Well let’s dive right in! As a prerequisite you should have some knowledge about node.js. We hope this how-to guide will help you to learn how to develop a bot with Wit.ai and node.js for Facebook Messenger yourself.
Facebook Messenger Platform
We choose Facebook Messenger as the messaging platform because it has the largest user base - more than 900 million users all over the world. And in April 2016 Facebook opened the Send/Receive APIs for developers. Facebook also bought the startup Wit.ai, that will provides the AI engine or "stories" behind our chat bot. So using Wit.ai in combination with Facebook messenger is a "natural" match and very easy to start with. You could of course also develop a bot for Slack, Telegram or other messaging platform that provides similar APIs. It depends on which group you are targeting - if you are in the B2C field and want to target mainly consumers then Messenger is probably a good option.A good way to get started is to follow Facebook’s Messenger platform quickstart tutorial. Start by creating a Facebook page (or use an existing one) and a Facebook App. Your Facebook App can remain in sandbox mode and your Page does NOT have to be publicly visible.
Before you can set up the webhook we need to look at Wit.ai and the node.js part first.
Wit.ai - Machine-Learning-as-a-Service
Sign up at Wit.ai and create a new bot - therefore follow the quickstart at https://wit.ai/docs/quickstart. Of course you should have some kind of story in mind, or some problem that your bot will solve, like looking up some kind of information from a webservice. Or for the sake of trying it out you could just use the weather example from the Wit.ai and always return 'sunny' or some random forecast.With Wit.ai you write stories like in a normal conversation and add your own functions that you will write - in our case - in JavaScript. So basically you plug in your functions (e.g. looking up the weather with a RESTful webservice) into the predefined stories. The cool thing about Wit.ai is that it is a natural language processor and will learn over time. You can teach it to improve understanding - just think about the different ways that a date can be written (tomorrow at 12am, Sat 27 May at 12:00, next Saturday at noon, etc.) - Wit.ai will do all the heavy labor and parse this into a JavaScript Date format.
Of course you don’t need Wit.ai or Artificial Intelligence (AI) to develop a chatbot - you could also set up your own logic or database and parse certain keywords to react upon, if you don’t need natural language processing. This is how most Slack bots work for example, using a rule based approach. Wit.ai will turn natural sentences into structured data, which is a good thing when you think about chat conversations and a non-technical audience, and includes a machine learning approach as well.
You should end up with a couple of stories like this:
Make sure they are all marked green, otherwise you probably have some “logical error” that the bot cannot resolve. For example if there are two different answers in your stories for the same logical path. In our case the bot still has problems with detecting email addresses and phone numbers. We don’t know if it’s because of the German language (which is officially supported in beta) or something else, but we’ll keep you update on this issue.
Have your Wit.ai Server Access Token ready for the next step.
The node.js part
The best way to start is the messenger.js example from Wit.ai. Its a fully functional example for the Messenger integration and a great boilerplate for building you own bot. Please go through the short documentation at the top of the file, it's basically what we're doing here. You can clone the the GitHub project at https://github.com/wit-ai/node-wit and start from there:You will need to npm install the necessary dependencies:
$ npm install --save node-wit body-parser express requestNote: the —save option will update your package.json file to include the dependencies.
You can also start with Jakob Reiter’s WitAI FB-Messenger Chatbot Boilerplate which extends the messenger.js example with some useful functionality and convenience methods. One difference is that he has moved the API keys to a config.js file instead of passing them as command line parameters. The config.js resides in the same directory as the index.js you will have to update it with your keys:
/** Config */

module.exports = {
    FB_PAGE_TOKEN: 'YOUR_FACEBOOK_ACCESS_TOKEN',
    FB_PAGE_ID: 'YOUR_FACEBOOK_PAGE_ID',
    FB_VERIFY_TOKEN: 'YOUR_FACEBOOK_VERIFY_TOKEN',
    WIT_TOKEN: 'YOUR_WIT_SERVER_ACCESS_TOKEN',
};
Just be aware that there was a small change in Facebook’s implementation in May 2016 (they switched from Integers to Strings for page IDs to fix an issue with the JSON body parser), which is not reflected in Jakob’s example yet at the time of writing. You can see the diff here.
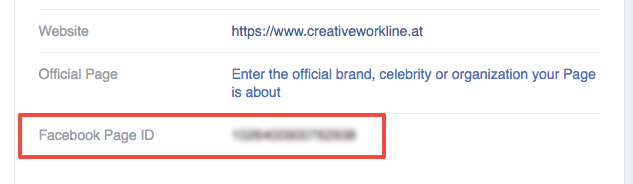
To obtain the FB_PAGE_ID and FB_PAGE_TOKEN you need to go back to your Facebook page. You will find the Facebook Page ID on the About tab of your Facebook page under Page Info. It’s a number, not the part of your page’s URL.
https://www.facebook.com/your_page_here/info/?tab=page_info
On the Facebook Developer page for your Facebook app, you can generate a token for that specific page that you want to use:
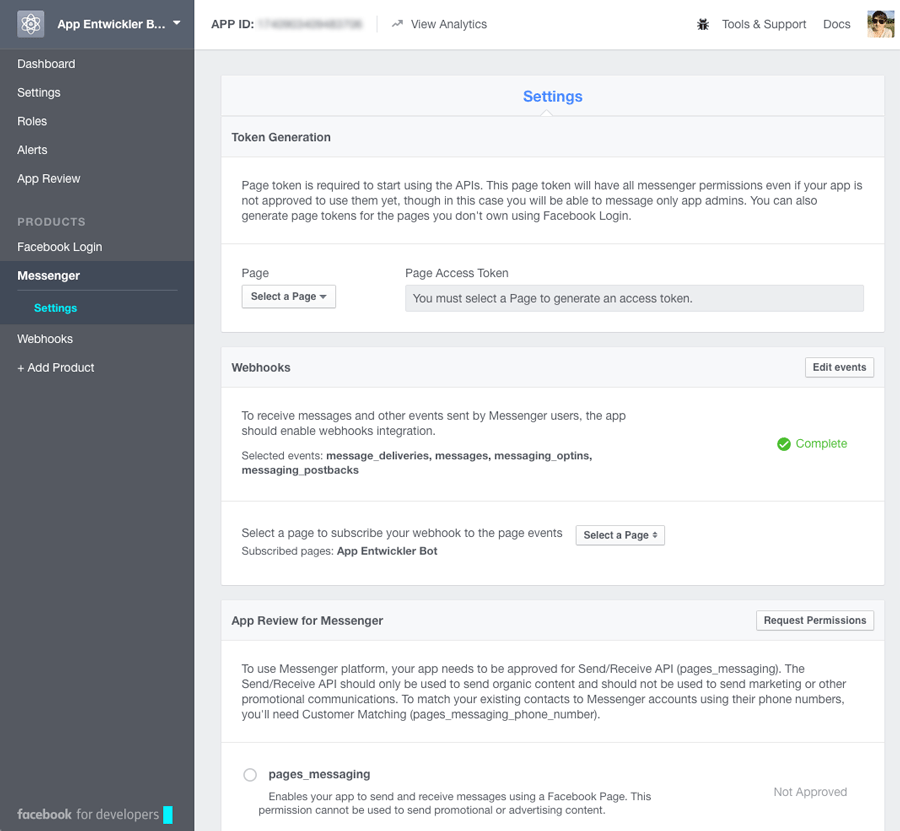
The good thing is that the page must not be publicly visible and the app must not be officially approved. Although in this case only app admins can receive messages.
Testing it locally with ngrok
In order to test it, you will have to the Express web server running somewhere. Before we install it on Google App Engine, you can run it locally on your development machine. This means the Facebook webhook must access your local machine to send HTTP GET and POST requests to it. There exists a handy tool called ngrok that will give you a public domain address and rout it to your local machine to a certain port. Download it from https://ngrok.com/download - you can simply extract it to the directory of the node.js project or somewhere else. Then run the following command with 3000 being the port of the local Express server:$ ngrok http 3000It will print out the public DNS name that you can then use, something like:
Forwarding https://35e6a050.ngrok.io -> localhost:3000
Now it's time to start up node.js and the Express server with:$ node index.jsYou can also run “npm start” instead if you have the following snippet in your package.json file:
}
  ...
  "scripts": {
    "start": "node index.js"
  },
  ...
}
If you don’t have it there, you should add it so that later on, App Engine will know which script so start. Now you have the “backend” running locally on your machine. If you open http://localhost:3000/ in your browser you will get a response “Cannot GET /”. This is correct, because there is no route defined on the root path.
Go to the Webhook configuration of your Facebook app, and enter https://35e6a050.ngrok.io/fb as the callback URL (not the /fb at the end!). The verify token is the FB_VERIFY_TOKEN from your config.js or command line parameter. You can use a random string for it.
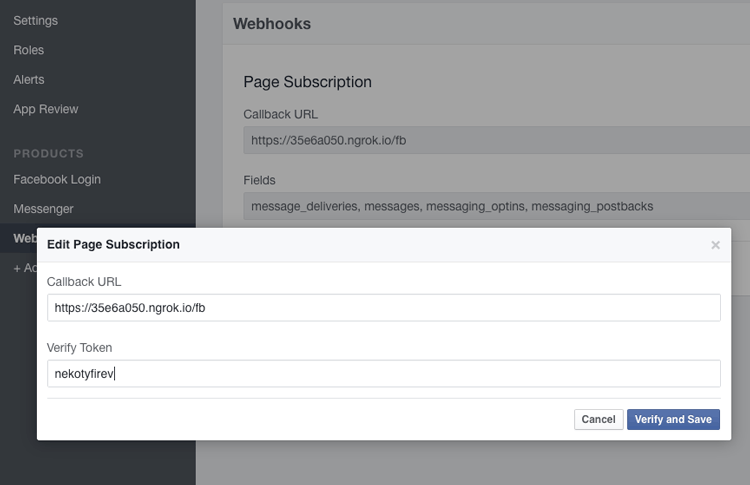
Once your click on “Verify and Save” Facebook will attempt to send a GET request to the URL and the node.js code will return the verify token. If you cannot save there is probably some issue with the port forwarding. Hint: Try to turn off all other applications running locally, as there might be something else occupying the port.
At this point, you should be able to communicate with your chat bot! Go to Facebook Messenger and send a message to your page.

Deploying to Google App Engine
The final step is to deploy the node.js code to some kind of server so that you can have a staging and production environment. Obviously you are expecting thousands of new users for your bot every day, so you better use an infrastructure that you can scale up. Or you're just too lazy to set up your own server… In bot(h) cases Platform-as-a-Service (PaaS) providers offer what your need without for very little (or no) money at the start. Most major cloud hosting providers have something for you: Google App Engine, AWS Elastic Beanstalk, Heroku, etc. We're using Google App Engine in this case, just keep in mind that node.js support is still in beta.App Engine runs on top of Compute Engine (so it is comparable to Elastic Beanstalk and EC2 in the AWS world) and provides you with a managed container where you can deploy your apps. Those of you coming from the Java world can think about it like a managed Servlet container or application server like Tomcat, Jetty or JBoss, with the good thing being that you don’t need to worry much about the underlying infrastructure including automatic horizontal scaling, security updates and a lot of “DevOps” tasks. Actually, when you deploy a Java application to Google App Engine, it will run in Jetty.
There are two different environments available for App Engine: The standard environment and the flexible environment. The App Engine flexible environment (Beta) uses standard Docker containers to wrap your code and run it on Google infrastructure, whereas the standard environment uses custom-built Google containers. Node.js is only available in the newer flexible environment.
You can sign up at Google Cloud for a free trial and will receive a 300 $ credit that you can use for 60 days. There is a nice Quickstart for node.js on App Engine. When you create a new project, make sure to create it in the US zone because currently node.js on App Engine is not available in Europe yet. Basically the necessary steps to get our bot up and running are:
- Select or create a Cloud Platform Console project on the projects page.
- Enable billing for your project on the billing page.
- Download the Google Cloud SDK.
Add a file called app.yaml to the root of your server project directory with the following content. This file configures your app for App Engine deployment:
runtime: nodejs
vm: true

manual_scaling:
  instances: 1

resources:
  cpu: .5
  memory_gb: 0.18
  disk_size_gb: 10

skip_files:
  - ^(.*/)?.*/node_modules/.*$
A few notes here:
- We set manual_scaling with one instance. If you don't specify manual_scaling, the default will be automatic_scaling, with a minimum of two instances.
- We are setting the resources to a very low memory_gb amount so that App Engine will launch f1-micro (1 vCPU, 0.6 GB memory) instance, which are the cheapest ones at a price of 0.006 $ per hour.
Unlike the standard environment, the flexible environment doesn’t offer free quotas (as advertised here), but all used resources are calculated based on the Compute Engine pricing. So we’re aiming at the lowest price for now, you can always scale up later. If you don’t specify the resources App engine will launch g1-small (1 vCPU, 1.7 GB memory) instances. See here for a discussion on why to use 0.18 as the memory_gb. Also keep in mind that pricing will change once the flexible environment moves out of Beta.
After installation of the Google Cloud SDK, the gcloud executable should be in your path, so deploying to App Engine is now as easy as executing this line:
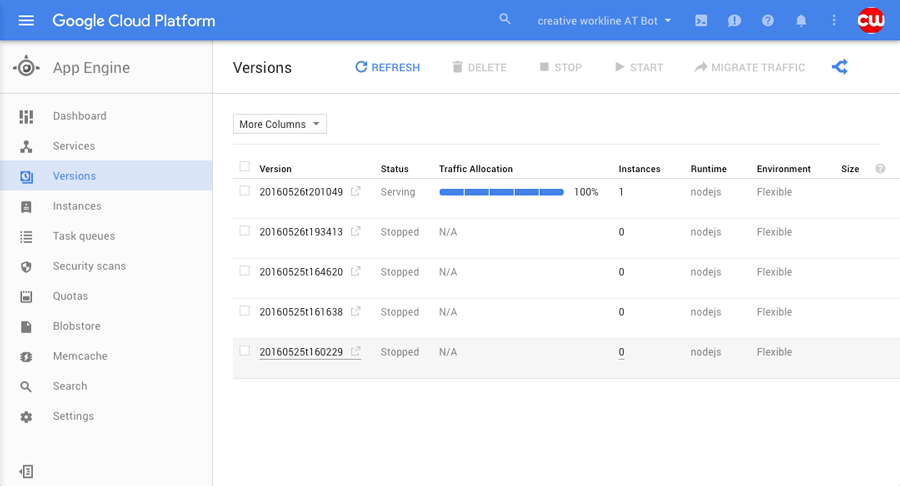
$ gcloud preview app deployThe command should print out the URL under which the application is deployed. You might wonder what the “preview” stands for? As of the time of writing the app command is still in Beta, so we need to add the preview in front of it. You will see that with every deploy, a new version is generated and promoted to the default version - this means that you can always roll back to an older version of your application.
Now you can go back to the webhook configuration of your Facebook app and replace the ngrok.io URL with the App Engine URL that should look like https://your-project-id.appspot.com/fb (again, /fb at the end). If something doesn’t work you can check the server logs in the Cloud Console under side menu > Stackdriver > Logging.
So not it’s time to start chatting with your bot on Facebook Messenger!
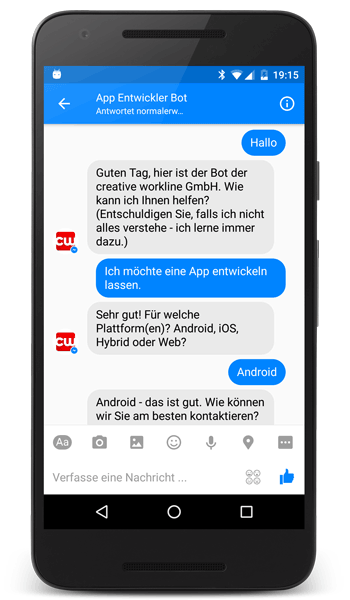
(Sorry again, it’s a bot that speaks German).
Next steps?
If you want to use the bot in production, you need to submit the Facebook app to review, because right now you can only send messages to administrators of the page. Also, you might want to use a better mechanism (that is, a database) for storing the use sessions. And finally, you should train your bot so that it becomes better.The good, the bad and the ugly
… and the alternatives.Google App Engine could easily be replaced with Elastic Beanstalk, Heroku or something similar. If you are using a database that runs on AWS, those two will definitely be a better option because the server and DB should run in the same datacenter. At the time of writing node.js on App Engine is not supported in the EU Region and it is still in Beta, so it might not be suitable for production use currently yet.
Wit.ai is kind of the weak point in the whole setup. But that shouldn’t be a surprise, because it’s a really young company and they are moving forward at a very fast pace. Editing stories in the web UI is fine for the beginning, but will probably become cumbersome with more complex scenarios. We’re pretty sure the Wit.ai team is aware of that issue and working on better solutions. The documentation is still pretty basic and a lot of trial and error and “finding out how stuff works” is needed. Also there is not a lot of information and help to find on the Internet.
We’ve seen strange behavior on Wit.ai, where the engine wants to recognize messages as phone numbers that are not phone numbers at all. Maybe it’s because the German language support is still in Beta? What’s your experience? Also there no information about if, when, and how they will introduce a pricing model.
You might want to check out the following interesting projects and services as well:
- fb-bot-framework is a node framework for Facebook Messenger Platform (FB Messenger Bot).
- Botkit is a toolkit for making bot applications. It is built upon node.js as well, and is designed to ease the process of designing and running useful, creative bots that live inside Slack, Facebook Messenger, Twilio IP Messaging, and other messaging platforms.
- Beep Boop: If you're not just building bots for your own fun (or your business) but want to offer a bot to others - probably in the B2B space - you should look at Beep Boop. It is by it's own definition a ridiculously simple hosting platform for your Slack and Messenger bots.
- Explore other bot engines like LUIS.ai, motion.ai, api.ai
If you are in or near Vienna, Austria, save the date and join us for the next Vienna Bots Meetup #2! This article was inspired by Jakob Reiter’s presentation from the first meetup.
We are looking forward to receiving your questions and feedback in order to improve this Messenger+Wit.ai+node.js tutorial! Just leave us a comment.
UPDATE 2016-07-22
- Wit.ai has released v4.0.0 of their node SDK on 28 June 2016. Thy moved to a Promise-based API, instead of callbacks. Read more about it here. At the same time, they've released Bot Engine v1. The boilerplate code won't work with v4.0.0, but the messenger.js and other examples have been updated.
- Google has released its Cloud Natural Language API Beta.